Triton Wake Up
By: Rick Shandley
Photos By: Rick Shandley
As light pickup truck engines go, the Ford 5.4L V8 does a good job striking the balance between fuel economy and pulling power. But the general feeling among folks who own or have driven the F-150 running a Triton 5.4L V8 is that the motor responds best when you wake it up. The 24-valve single overhead cam (SOHC) V8 puts out 300 horsepower at 5,000 rpm and delivers 365 lb.-ft. torque at 3,500 rpm running 9.8:1 compression on common 87-octane pump gas through about 330 cubic inches of displacement.
Three hundred horsepower at 5,000 rpm is about that point in time when you are merging onto the freeway from a rolling start at the top of the onramp. Even the torque, which is significant, is at its strongest at the upper end of each shift point to where you would have to be revving the engine.
Improving the performance without giving up the reliability engineered into the drivetrain can be approached through several methods. You could gain efficiencies and performance by freeing up the air intake and exhaust paths. You can run a performance computer program or change the chip to re-calibrate the electronic language that controls engine performance. Or you can look into a bolt-on supercharger that delivers 80 to 110 horsepower, similar torque increases, and throttle response that shifts your brain in its bucket.
Ah, wouldn’t it be nice if that kind of performance were okay with the state you live in and as a bonus it didn’t void your new vehicle warranty? Well, that’s where the Roush Performance group has endeavored to establish a competitive advantage in the automotive aftermarket for the Ford 5.4L V8 with the ROUSHcharger featuring 6 PSI of boost in a non-intercooled supercharger. This hardware is legal in all 50 states and keeps the factory warrantee for the drivetrain in tact.
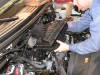
If you have the confidence, tools, and know how to tackle this install, it will take about eight hours to complete. You will have to remove your factory electronic control module (ECM) and Fed-Ex that to Roush on a 48 hour turn around to reprogram the factory ECM to the performance tune compatible with the supercharger. For the record, we found this Roush Performance supercharger to be of the most complete systems of any kind we have dealt with…ever. From the packaging of the hardware kit to the installation instructions, to the fit and clearance of every piece, this supercharger system is of the highest quality. Everything you’ll need is included in this kit.

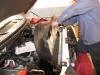
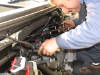
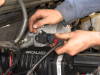
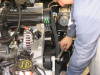
Unplug powertrain control module (PCM), remove, and prepare the FedEx package that comes with the kit. Do this right off the bat and get it underway first thing.
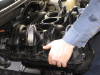
Remove entire air box assembly
Remove throttle body.
Remove radiator core-support cover.
Unbolt and pull out the fan shroud and fan assembly.

Unburden the serpentine belt and remove.
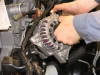
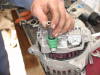
Remove alternator
Disconnect fuel rail lines from both sides of the plastic intake manifold.
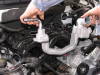
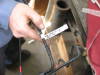
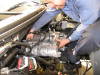
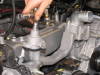
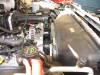
Disconnect all hoses and remove aluminum crossover pipe, also referred to as a coolant bridge.
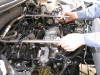
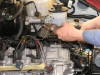
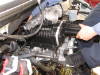
Unbolt intake manifold. Slide it forward and tilt up to disengage brake booster hose attached on the bottom of the driver’s side. Remove intake manifold.
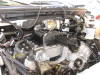
Cover intake head ports with masking tape to keep any loose debris from falling into the motor.
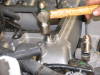
Remove the two 15mm nuts attaching radio capacitors to the front cover of each cylinder head.
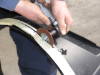
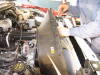
You will trim 31mm of material away from the fan shroud to accommodate shifting the fan forward 31mm. Sandpaper works great to smooth the rough edges.
As installation begins, notice you will be using genuine Ford components wherever appropriate.
Install boost bypass solenoid and control bracket to the bottom of the new Roush aluminum intake manifold.
With the Roush aluminum manifold right side up on your workbench, install the ACT sensor and vacuum port fittings to manifold.
You will re-install the factory head gaskets using the nine new crush limiters (spacers) supplied with the kit.
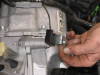
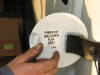
To provide clearance for the front of the supercharger, this adapter is supplied for the factory alternator. This is a simple step, but an important one.
You will splice in the ROUSHcharger bypass solenoid into factory CMCV harness.
Remove masking tape from cylinder heads and do a complete inspection for loose debris. Install the Roush aluminum intake manifold. Follow the torque sequence pattern for bolting down manifold.
Install coolant bridge and all hardware components.
Two metal dowels from the hardware kit will tap into the manifold and act as guide pins for proper seating of the supercharger.
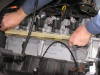
Install fuel rails and related components such as the fuel injector wiring.
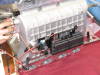
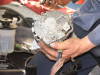
Lay down the ROUSHcharger gasket onto the intake manifold, over the dowels. Install the Roush supercharger onto the intake manifold.
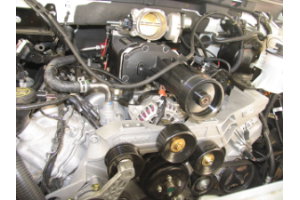
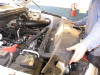
Here’s the Roush supercharger taking its rightful place in an otherwise nondescript 2006 Ford F-150. Imagine the sleeper effect on the Hemi Ram as you emolliate the rear tires at the stoplight.
Hook-up the throttle body.
Install the alternator and reinstall first sheave serpentine belt.
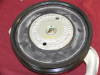
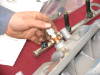
Here is the crank adapter to drive the supercharger pulley. Notice that it’s a Ford part.
Front belt drive (FEAD) bridge is installed using the studs where the original radio capacitors were located.
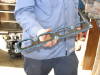
Install the supercharger drive belt.
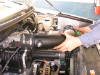
Reinstall the fan and fan shroud at same time.
Notice the result of trimming the fan shroud to provide correct clearance.
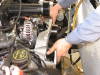
Install new intake system provided with the kit.
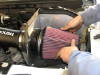
A K&N filter charger is provided with your Roush supercharger.
Replace radiator core cover.
You’re running super unleaded from here on out.