Shifty Plans
By: Robert Brown
As our collective search continues to find the “one more piece” of billet aluminum or stainless steel to add to the interior of our prize possession… our trucks. Companies like Trenz have stepped up to give us yet one more option for those of us with the creature comforts of the automatic transmission.
Most of you know there are a lot of modifications (Mods) out there that can intimidate the beginner truck builders, and even some of us that might have the knowledge and know how of the trade. A lot of aftermarket products are somewhat taxing and can test the patience of the calmest of men and women. Not all of us as truck enthusiasts were born with a wrench in our hands, but hopefully through little “how to” articles like this, some of the less gifted truck addicts will be able to say to buddies and family… “I did this,” or “Do you want me to show you how it’s done?”
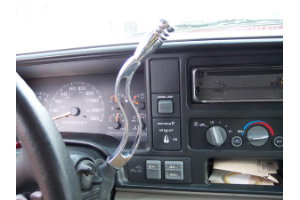
This is my experience with the installation of the Trenz billet aluminum shifter handle on a 1998 C/K 1500 GM truck with a 4L60E automatic overdrive transmission.
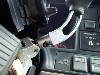
First step is to lift the tilt upward so that you have an easier access for the following steps involved. Grab hold of your tilt knob and pull outward towards the driver’s door. The knob should pop out with some force applied.
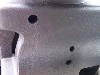
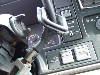
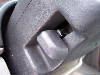
Next: Take a T25 screwdriver or bit and remove the top left and bottom right torx head screws (as shown in pic). This will allow the bottom half of the column cover to drop away from the upper half in the following steps.
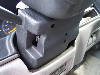
This is as far as you need to remove the bottom half of the shell at this point. Be sure not to 'reef' on this plastic, ‘cause it will break with to much force.
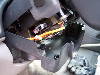
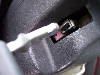
Now pull the factory shifter boot upward on the shifter handle to reveal the factory torx screw.
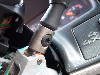
This close up shot simply gives you a better idea of a torx screw.
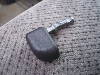
Next, remove this torx head screw (may take some torque to remove this due to factory loc-tite). Then move shifter slightly to remove it from sleeve. DO NOT REMOVE THE ROLL PIN TO RELEASE SHIFTER HANDLE.
Now this is where you will remove your shifter boot from your factory shifter handle and place it on the new billet version. Note where the placement relation is on the shifter to boot. There is only one way this boot is supposed to mount.
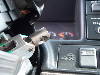
Slide the new shifter (with the shifter boot slid up the handle) into position. Before installing the torx screw, put some thread locker on the threads. We suggest using only the blue loc-tite as red is overkill. This is for safety, so please do so.
Next, sandwich your two column covers together paying close attention to clips and shifter boot location before completing. You will have to do this while sliding the shifter boot into position. Then reverse procedure being putting the torx screws back in.
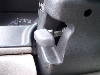
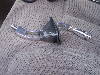
This is what your tilt knob will look like when removed from its position.
Finally place the tilt knob back into slot and push (towards column) firmly into.
And...wah lah! You’re done. With parking brake applied, run vehicle through the gears once or twice to be sure that everything works fine. Be sure to check your tilt to be sure it is working as well.