Playing My Tune
By: Dan Sanchez
Photos By: Dan Sanchez
It’s been a long held belief that Headers and a cat-back exhaust are good for making additional horsepower and torque. The theory is that by reducing exhaust backpressure, additional performance gains can be had. However, does this hold true with late-model, fuel injected engines that are totally controlled by the vehicle’s computer system?
Furthermore, late-model engines are more compact and fit into tighter engine compartments that are part of the vehicle’s design for shorter and smoother hood lines. The idea is to create more aerodynamics. The result however, is that it is harder to install a set of Headers onto these engines and many aftermarket header manufactures have moved from long-tube Headers to shorty styles that have many enthusiasts wondering if they are actually worth the cost of installing.
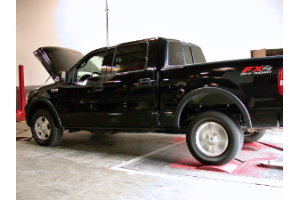
We decided to try to test this theory with a 2004 Ford F-150 that is equipped with a 5.4-liter, 3-valve modular engine. Compared to previous year model trucks, the 2004 and 2005 models have a much tighter engine compartment and installing a set of Headers on this truck is a full-day task that requires additional work.
To help us with this test, we contacted Gibson Performance Exhaust , who manufactures a shorty style header and a Swept Side Exhaust system for this application. According to Shawn Gibson, head of research and development, the goal for the F-150 was to produce as much useable horsepower as possible. “It makes no sense to build a Race exhaust system for a truck that will see between 1800 rpm to 4,000 rpm most of the time,” says Gibson. “We try to design a system that allows the vehicle to make a maximum amount of power from 2500 through 3800 rpm where it is more useful for towing and daily driving performance.”
Of course, we had to pick the most difficult installation possible. According to Gibson, installing the Headers into the late-model F-150 requires removal of the starter, and on four wheel drive applications, we also had to unbolt the engine mounts and lift the engine up a few inches. This is done to make additional space for inserting the Headers from underneath the vehicle. In this case we also had to remove the transmission crossmember in order to move the factory Y-pipe back enough to remove the driver’s side exhaust manifold. The front axle drive shaft also had to be removed for additional clearance.
Once the exhaust manifolds and studs were unbolted from the engine, the Gibson Headers were installed. The Headers are designed with thick flanges and comes with its own hardware. The Headers that were used for this application were ceramic coated, stainless steel. They bolted onto the engine with the gaskets provided by Gibson. Once this was done, the factory Y-pipe was bolted back to the collector flanges on the headers.
With the transmission cross member, starter and driveshaft back in place, the engine once again rested on the engine mounts and was bolted down. With that accomplished, bolting on the cat-back exhaust system was a breeze to install. The system is completely slip-fit and uses C-clamps to hold it in place. Gibson’s muffler is a baffle design that absorbs sound but flows a large amount of exhaust though it. The company tunes the inner baffles of the muffler to provide the best air flow for the application, and to eliminate all resonance in the cab.
Once the entire exhaust system was put together, the truck was placed on the dyno to see the results. The baseline runs showed that the 5.4-liter V8 produced 147.2 horsepower and 241.8 lbs.-ft. of torque at the rear wheels. Most of the power was made from 1,800 rpm all the way to 4,000 rpm. With the addition of the Gibson shorty Headers and cat-back exhaust system, the engine produced a peak of 160.3 horsepower and 263.4 lbs.-ft. of torque. Most of the power gains were from 3,000 rpm to 3800 rpm, where the truck netted a 13 horsepower gain and an additional 21.6 lbs.-ft. of torque.
The results of this test does show that a well Tuned header and exhaust system can definitely make a difference. The Headers typically retail around $420 for a chromed set and a ceramic coated set like the ones we used here, retails around $700. The aluminized, single exhaust retails for around $375. So how about the sound? Surprisingly, the truck didn’t sound much different than stock. There was a hint of a deeper tone but the truck was extremely quiet in the cab. The performance, however, was evident as the truck could now spin the Tires from a standing start, demonstrating that its not the peak performance that counts, but performance over a wide range that makes the most difference.
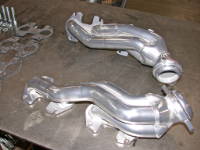
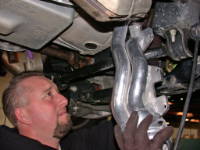
A pair of shorty headers are a popular upgrade with today’s late-model, computer controlled engines. These ceramic coated headers are from Gibson Performance. We installed them and the company’s cat-back exhaust onto this F-150.
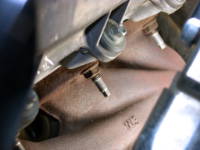
The factory exhaust manifolds work fine, but the airflow can be improved by replacing them with headers. The method to do so is to unbolt and remove the studs.
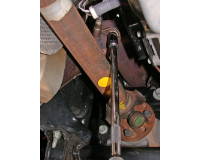
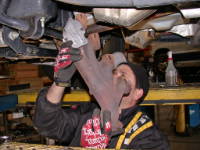
Gibson’s R&D technician Shawn Seidelman, began the F-150 installation by unbolting the factory Y-pipe from the manifolds.
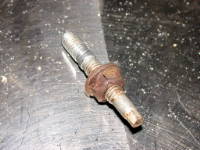
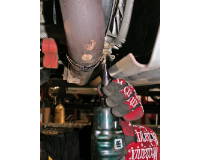
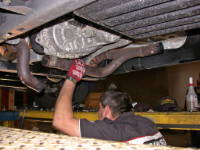
Meticulously, each bolt and stud had to be removed from the engine’s cylinder head.
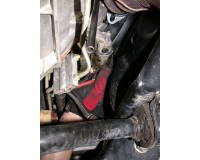
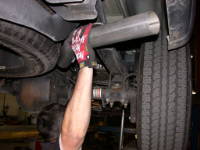
Seidelman, had to remove the truck’s 4wd input shaft to remove the driver’s side manifold from the vehicle.

With the studs removed, the cylinder head is exposed and the area needed to be cleaned before bolting on a new Gibson gasket and the header.
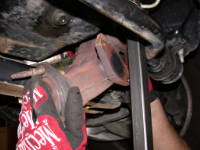
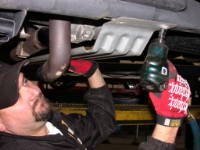
Removing the passenger side manifold was a bit more difficult. Seidelman had to move the starter aside and lift the engine a couple of inches before gaining enough room to remove the manifold.
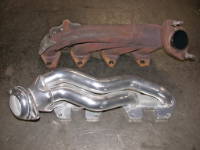
Here’s a comparison between the factory exhaust manifold and the Gibson ceramic coated header. The header uses thick flanges and bolts directly to the factory Y-pipe without any modifications.
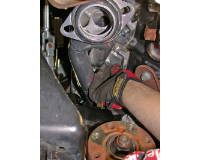
With enough space between the engine and the frame, the Gibson header is maneuvered into the passenger side position.
Once the passenger side header is in place, Seidelman reinstalled the starter motor, which was removed to make additional room.
It’s a tight fit, but the headers bolt onto the factory cylinder heads with the supplied gasket and hardware.
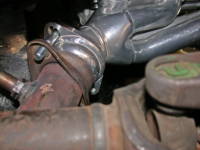
Once the headers are secured, the factory Y-pipe is bolted to the header flange.
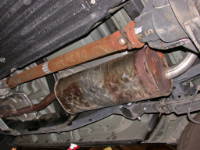
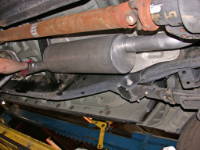
In addition to replacing the exhaust manifolds, we also wanted to replace the restrictive factory exhaust system.
The entire system is clamped together and Seidelman simply unbolted the clamps so that the exhaust could be removed.
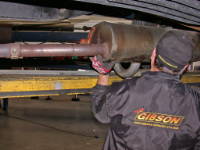
Unhooking the muffler and tubing from the exhaust hangars allowed Seidelman to remove it.
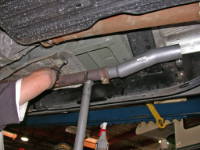
One problem we faced in trying to reconnect the factory Y-pipe was that there wasn’t enough room to maneuver it. Seidelman had to temporarily remove the transmission transfer case shield.
With the transfer case shield out of the way, it was easier for Seidelman to maneuver the Y-pipe to fit together and fit the Gibson system onto the end.
The head pipe is slipped into the rear of the Y-pipe that exits out from the catalytic converters.
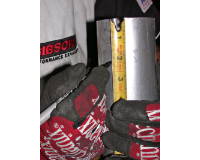
Seidelman marks two inches on each pipe to ensure that it slips up to that point. This allows the system to fit together properly.
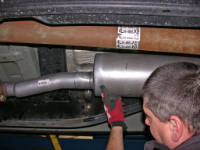
The muffler is slipped onto the head pipe up to the two-inch mark and the rest of the system is assembled in the same manner.
The rear tailpipe section is slipped into the muffler and the system is checked to make sure it all fits together.
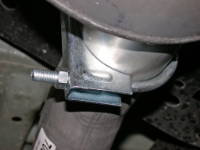
Gibson’s exhaust systems can be clamped together but Seidelman recommends to at least add a tack weld to ensure it stays that way due to vibration.
The remaining piece of the tailpipe was installed, along with a polished, stainless steel tip. Once this was done, the truck went on the dyno and it gained an additional 13 horsepower and 21.6 lbs-ft. of torque.